Gorilla Trekking in Rwanda: The Ultimate Guide

Gorilla Trekking in Rwanda

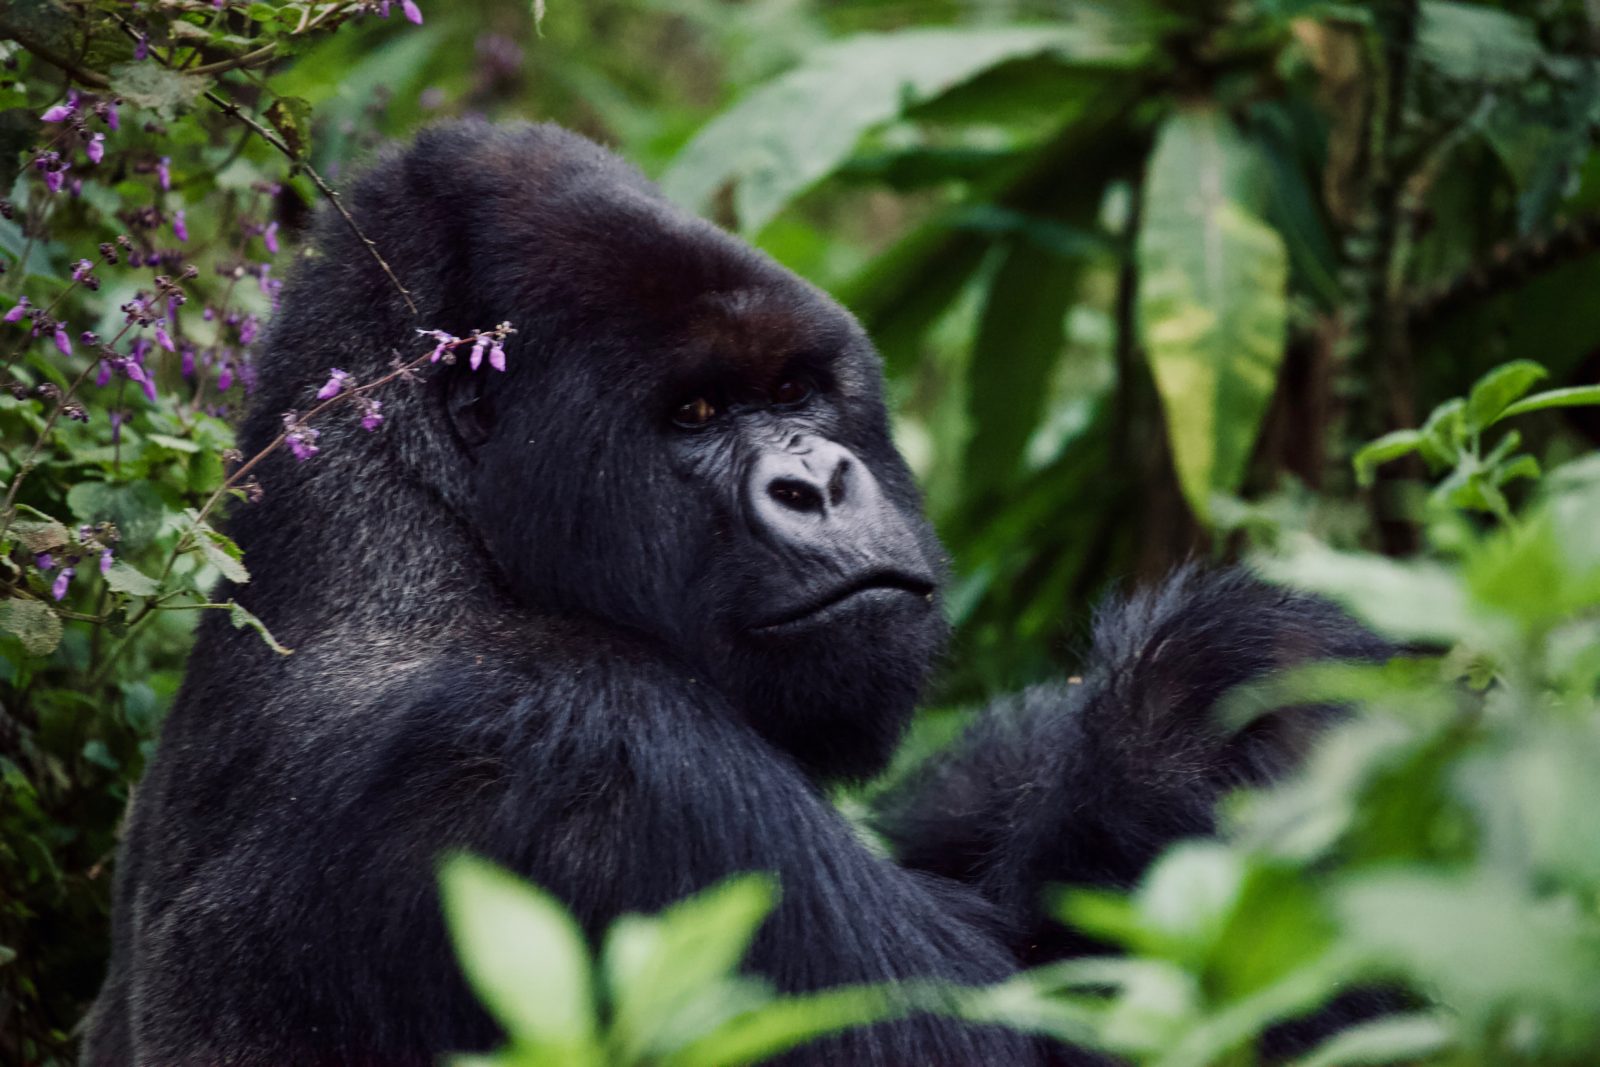
I am drawn to nature, but there are few things that have been as awe-inspiring as gorilla trekking in Africa to see gorillas in their natural habitat. I almost did not check this item off of my bucket list because it is quite an expensive adventure. However, I am so glad that I did not miss out on this opportunity.  The Gorilla Berengei Berengi (Mountain gorilla) lives in the Congo, Rwanda, and Uganda. There are some 900 gorillas that remain in the region as the numbers have dwindled due to poaching. That makes this experience even more amazing. 

Bucket List: Moroccan Desert Tour

What to Expect

After an early rise, you will meet up with a crowd of other excited trekkers in the Volcanos National Park. Before you are divided up into groups of 8 people, dancers perform the Rwandan Traditional Dance.

Gorilla Trekking in Rwanda_pic 1
Gorilla Trekking in Rwanda_pic 3
Gorilla Trekking in Rwanda_pic 2

Depending on where you start gorilla trekking, it may take you up to 1.5 hours to drive to small villages near the mountain and another 30-45 minutes to reach the base of the mountain. Before the trek, you will be able to hire a porter for about $20, which I highly recommend, to carry your belongings and help you up the mountain.

Before you begin gorilla trekking, your guide will talk to you about safety, respect, the gorilla community. They will also discuss something about the family you will meet. Now the real hike begins!!

We walked through a beautiful bamboo forest and then we started the climb. Gorilla trekking is TOUGH. Your guides will barely break a sweat as they cut back the thick forest and bamboo to make a path. Meanwhile, you huff and puff up and question your choices in life. The trek can last anywhere from 30 minutes to several hours.

My group had a very steep, 3 hour climb. Just as we started to question what we had gotten ourselves into, we found a large family of gorillas with twin babies.

We even had a close encounter with a naughty black back who jumped out of a tree right in front of us. After 1 hour with the gorillas, we started our hike down the mountain, which was a much easier task. Our trek was 6 hours round trip. It was worth it.

What to Pack for Gorilla Trekking

• Long pants and long-sleeved shirts: Even if it is hot, you will want to be covered to protect your skin from stinging nettles

• Hiking boots: No flip-flops!! You will have major regrets if you choose to hike with exposed feet. However, I recommend keeping a pair in your backpack for when you complete the hike. Your feet will want relief after hours of hiking.

•Rain jacket:  Even if there is not call for rain, it could happen suddenly.

•Plenty of water and lunch or snacks: Remember, you may be hiking for hours

•Good Camera: I took a very expensive camera and lens, put them in my backpack, and let my porter carry it until we found the gorillas.

• Plastic bag for muddy boots. Our hotel cleaned our Boots, but not every hotel offers that service.

•Hats, sunglasses, and sunscreen.

•Binoculars

Book your trip for gorilla trekking well in advance of your planned travel. The number of trekkers is limited to about 56 per day to protect the habitat. The permit for foreign visitors to trek in Rwanda is $1500pp. If that is outside of your budget, the permit in Uganda is much cheaper at $600.

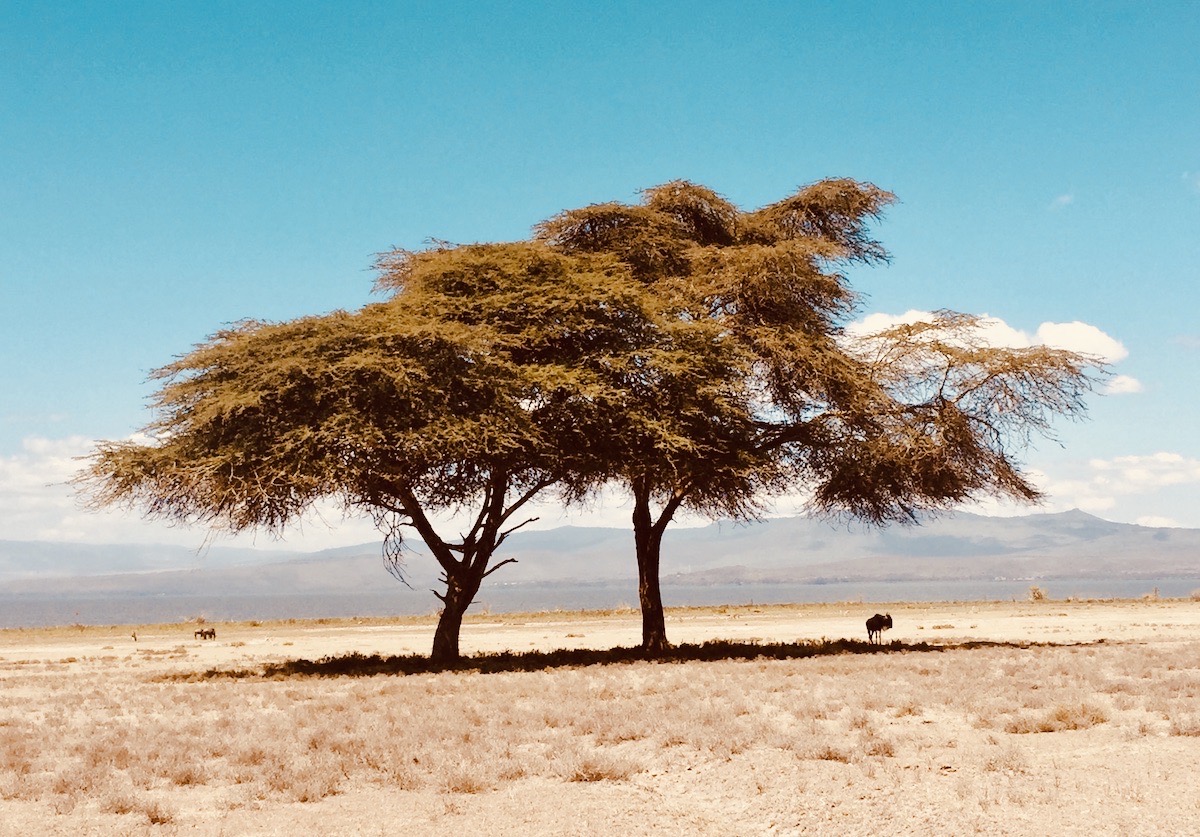
Enjoy going on Safari? Check out this post: Planning your Safari in Kenya

10 Fun Facts About Sumo Wrestling in Japan

10 Fun Facts about Sumo Wrestling

I originally only went to a Sumo wrestling tournament because it was on my bucket list. However, I became more interested in the sport as I prepared for my trip to Japan. Since the matches are conducted entirely in Japanese, here are 10 fun facts about Sumo wrestling to help make the experience more enjoyable.

1. Foreigners are some of the best wrestlers: Many of the top contenders in Sumo are recruited from abroad and several of them are from Mongolia. Japan recently limited the number of foreign wrestlers (defined as born outside Japan) to one per stable. They must speak Japanese and understand Japanese culture.

2. Life of a wrestler: Sumo wrestlers must live a traditional lifestyle. They are required to live in training stables, dress in traditional Japanese clothing, and strict rules dictate every aspect of their lives.

3. Crowd expression: The crowd does not have a problem cheering or booing throughout the match. They show their ultimate disappointment by throwing their seat cushions toward the ring.

4. Hairstyle: You will notice that everyone has the same hairstyle. The hair is oiled and combed into the shape of a ginkgo leaf. Apparently it also provides cushion for the head if the wrestlers fall.

5. Rules, Rules, Rules: Eye gouging, hair pulling, choking, hitting with closed fists, and kicking to the chest or abdomen are off limits. The goal is to push your opponent out of the ring or make them touch any part of their body besides the soles of their feet on the ground.

6. Like the ring? Take some: At the very end of the tournament, some fans break off a piece of the clay ring for a souvenir.

7. For men only…or is it?: Historically, women were allowed to participate in Sumo wrestling at some Shinto Shrines, however, it is currently forbidden.

8. The chubbier the better: Today it is expected to pack on weight because there are no weight divisions, so wrestlers do not want to be mismatched during competitions. However, Sumo wrestlers were not always chubby.

9. Sumo is an old man’s sport: Okay…old women too. Most of the Japanese youth are not interested in Sumo. I am not sure why not. It was super fascinating to watch!

10. What are you wearing: Sumo wrestlers wear a Mawashi (廻し)),  a heavy fabric loincloth that the wrestlers grab and  hold to gain an advantage during the match.

How to See Sumo Wrestling in Japan: A Guide

Sumo Wrestling in Japan: A beginners guide

How to see sumo wrestling in Japan was originally a great mystery for me. Of all the sporting events on my bucket list, sumo wrestling was the first that I checked off of the list. Sumo (相撲 sumō, literally “striking one another”), is a Japanese style of wrestling and the country’s national sport. Its origins go back at least 1500 years, making it one of the oldest organized sports. Only men participate in sumo and there are several rituals and religious elements, such as purification of the ring with salt.

For those of you who are itching to watch sumo wrestling in Japan, there are six major tournaments every year held around the country and each tournament last 15 days. I attended the tournament held in Osaka, Japan, every March. Getting tickets and understanding the rules in Sumo requires some planning. Here are a few tips to seeing this fascinating sport.

When to see Sumo

If your dates are flexible and you definitely want to watch sumo wrestling in Japan, you should plan your trip around the sumo tournament schedule. If not, then you should try to go to the sumo exhibitions that are held in between tournaments and occasional retirement ceremonies. You can view the full schedule of these events here.

Another option is to see a morning sumo practice by visiting a sumo beya (すも部屋, sumo stable) where the wrestlers train. I recommend that you book a tour through viator.com. You should expect to sit on the floor and be silent during the practice.

How to get tickets

Unlike many things, if you want to watch sumo wrestling in Japan, you must make a plan. Getting tickets is probably the hardest challenge. They sell out quickly, sometimes within minutes of going on sale. If you live on the other side of the world, it is even harder because of the time difference. Don’t fret! You can usually buy tickets through a third party. I used Voygian, which is a good site to book tickets and tours in Asia.

You have to pick up tickets in person in Tokyo, so build that into your trip, especially if you plan to see a tournament outside of Tokyo.

Tournament Day

If you want to see sumo wrestling in Japan, you should know that tournaments last all day and are a multi-day event. The wrestlers compete based on their ranking so the best wrestlers compete late in the day. If you show up when the doors open, the crowds will be slim and the matches may not be as exciting. I recommend that you plan to go in the last 2-3 hours of the day’s tournament when the top division starts and the crowds are lively.

Sumo Rules and Traditions

The best way to see sumo wrestling in Japan is to enjoy it as the locals do. The tournaments are completely in Japanese with no English translation, so I went along with what the crowd did. Cheered when they cheered and booed when they booed!!  Here a few tips to help you understand what in the world is happening.

• Matches take place in a Japanese ring called a dohyo (土俵). It is made of clay and covered in a layer of sand.

• There are no weight restrictions, so wrestlers try to gain weight to prevent being matched against a much heavier wrestler.

• There are several religious traditions the wrestlers observe during the match. For example, they sip sacred water and throw purifying salt in the ring before the match; the referee dresses like a Shinto priest; and the wrestlers clap their hands when they enter the ring to summon the gods.

• Before the match starts, the wrestlers spend several minutes showing off. They extend their arms, stomp their feet, and squat to size each other up and to intimidate their opponent.

• After minutes of “warming up” the match only lasts a few seconds.

• There are 70 winning techniques in sumo. Some include pushing your opponent out of the ring, throwing them to the ground or getting them to touch the ground with any part of their body besides the soles of their feet. You only get one shot. There is no best 3 out of 5 in this sport!!

10 Etiquette Tips for Japan: First time visitor guide

10 Etiquette tips for Japan

Proper manners are important when visiting Japan and are widely practiced in the culture. Here are 10 etiquette tips for travel in Japan to keep you from committing a faux pas.

Tip 1: Greetings

Shaking hands is not common in Japan. Instead, people bow. Bowing is not only used as a greeting, but as a sign of respect in many situations. The deeper the bow, the more respect one is displaying. Small nods with the head are seen as casual and informal, but completely alright for foreigners.

Tip 2: Eigo o hanashimasu ka? (Do you speak English?)

Many Japanese people speak some English, but it is not widely spoken and you should not expect everyone to understand you. It goes a long way to learn a few Japanese words to help you along your travels.

Tip 3: Slurp Slurp (Eating noodles)

Noodles are everywhere in Japan. A cheap and quick meal that never disappoints. Slurping while eating noodles is common practice and expected. I have heard that it is customary to swallow your noodles whole, which I did not. But I probably also took longer than the average person from Japan to finish my meal.

Tip 4: Chopsticks

I tried so hard to handle chopsticks like the locals. This included me staring at people’s hands constantly to mimic how they properly positioned the chopsticks between their fingers. I FAILED!! However I did learn:

  • Never point chopsticks at another person
  • Use the opposite side of your chopsticks for communal eating
  • Do not pass food from chopstick to chopstick
  • Do not stick chopsticks into a bowl of rice
  • When not using your chopsticks, they remain horizontal in front of your plate vs vertical like you would place a fork.
10 Etiquette tips for Japan

Tip 5: Paying for goods and services

It is very rare to pass money or credit card by hand to pay for goods or services. You should place your payment in a tray that will be placed in front of you instead.

Tip 6: Tipping

Tipping is not practiced in Japan and generally will not be accepted if you leave one. It is okay to tip guides, but always place the tip in an envelope before passing it to them.

Tip 7: Visiting Shrines

Shrines are a large part of the Japanese culture, so approach them with respect. It is customary for people to stop at the purification fountain before entering the shrine. If you want to purify yourself, there are several steps to doing it properly. If you are worried about being disrespectful, you can just watch to see how it is done.

Tip 8: Take off your shoes

You must remove your shoes if you are entering a shrine or temple, Japanese homes, and traditional Japanese hotels. If you are uncomfortable with bare feet in strange places as I am, keep a pair of clean socks without holes with you at all times. Where required, shoe removal is nonnegotiable.

Tip 9: Baths and Hot springs

Hot springs (Onsen) and bath houses (Sento) are very traditional aspects of the Japanese culture, and are interesting and relaxing experiences. I have only visited an Onsen, in which bathing tooks place outside, and had Mt. Fuji as the backdrop!

  • You must clean yourself before entering an Onsen or Sento
  • Bathing suits are not allowed
  • Tattoos are generally not allowed as they are associated with criminal activity
  • You will be given a small towel, which most people put on their heads while soaking. You should refrain from putting it in the water.

Tip 10: Public Spaces

Speaking on the cell phone on public transportation is not common and considered rude. It is also common to wear face masks in public. While the most common reason is to keep from passing sicknesses, a Japanese guide told me that some women wear them if they have not had the chance to put on makeup or if they are shy.

Either way, it is rude to blow your nose in public, and I swear I did not see a single person cover their mouths when they sneezed or coughed in the two weeks I was in Japan. So maybe the mask is the way to go!

10 Easy Tips for Travel in Japan

10 Easy Tips for Traveling Japan

Traveling in Japan is much easier than expected and you can get lost in the many cultural surprises you will discover along the way. Let us first start with some 10 easy travel tips for travel around Japan.

Many travelers are not planners and like to remain flexible. However, I recommend planning at least a few things and becoming familiar with Japan before you depart for your trip. This will make it easier and less expensive after you arrive.

10 ETIQUETTE TIPS FOR JAPAN: FIRST TIME VISITOR GUIDE

Easy Ways Getting Around

Taxies are insanely expensive in Japan, so the train and subway are best ways to get around. The rail and subway systems are massive, and some of the stations do not have English translations of the train lines. I recommend either stopping at the JR East Travel Service center in the Narita Airport before heading into the city. You can also order or print maps of the cities you plan to visit ahead of time, which you should definitely do for travel outside of Tokyo.

The rail and subways in Tokyo are like underground cities and are the busiest in the world. Over a million plus people transit some of Tokyo’s stations each day. These are no ordinary train stops, where your only options are to go left or right when exiting.

One of Japan’s largest station, Shinjuku Station, has 200 exits. It is important to have an idea of where you need to end up. Citymapper will give you step by step instructions on how to plan your trips, to include telling you what part of the train you should get on and which exit to take out of the train station to get to your final destination.

Trains arrive and depart exactly when they are scheduled too! If you are late even by 30 seconds, you risk missing your ride.

East Navigating Japan Subway

JR Rail Pass

If you are going to be in Japan for several days, I highly recommend purchasing a Japan Rail Pass. It is a multi-use, discounted ticket for travel on all JR national trains in Japan. The pass includes the Shinkansen bullet trains you take to get around the country. It is a much cheaper way to get around and will save you LOTS of money. Just to paint a clearer picture, a 7 day pass cost me the same amount as a one round trip ticket between Tokyo and Kyoto.

The pass is only available for foreigners and you must purchase it before arriving in Japan. There are options for 7, 14, 21 consecutive days of travel. It takes about 2-3 days for the pass to arrive at your mailing address. I recommend giving yourself some extra time to receive it.

You can validate your pass at the JR East Travel Service Center at Narita airport when you land as well as other areas round the country.  The clock starts on the pass after you use it for the first time.

Subway/Metro

You cannot use the JR rail pass on the Subway in Japan, but it’s relatively inexpensive to ride. Tokyo offers a 24, 48, 72-hour metro tickets that are only sold to foreigners. Starting price is less than $8.

Google Maps/SIM cards

If you have an unlocked phone, you should buy a SIM card at the airport. Having the ability to easily use the internet and Google Maps during your trip will make life much easier (Prices start around $30).

You can order a SIM card before your trip, but I like to buy it in country to to ensure I get what I paid for.  If buying a SIM card is not an option, I recommend downloading Google Maps to use offline or renting a pocket WIFI router. There are many places where you can purchase one.

Book a Tour

Navigating most new cities can be difficult not matter the country, but it can be even harder when part of the population does not speak your native language. While getting around Japan, I exclusively used the JR and Subway systems, but when I wanted to visit a site and learn more about the location, I booked tours through Viator.com, tokyotravelpal.com,  and getyourguide.com

Be on time!

The Japanese are very punctual, more so than in any other country I have traveled to. No matter what you are doing, you need to be on time so you do not miss out. Trains arrive and depart exactly when they are scheduled. Also, tours will start exactly on time. I was five minutes late to one tour because I took the wrong exit out of a subway stop and had to walk a half of a mile to get to the right destination. The tour group left me and I had to spend the next hour catching up with them. Also, the Japanese just consider tardiness to be rude. So, do not be late!!

Where do I put my trash?

I was completely surprised that I could not find a single trash can in public. Okay, there are a few, but they are hard to find. The most stated reason for the lack of trash cans is because of the coordinated terrorist attack on 20 March 1995.  A deadly sarin gas was released into subway trains in Tokyo.

No trash cans also means there are no paper towels to dry your hands in bathroom. Where to dispose of them? You should keep a small plastic bag with you for your trash and a few hand wipes without during your trip.

Speaking of toilets…

There are different types of toilets in Japan. The Japanese style toilet, which is low to the ground, modern toilets, and high tech toilets with heated seats. The trick is that you may stand in the bathroom stall scratching your head trying to figure out how to flush them. It is not always obvious and there were a few times I just walked away.

Best Time to Go

You can visit Japan anytime of the year, but when you chose to go all depends on why you are going and what you want to see. I have several bucket list items to check off in Japan and I have completed most of them, but timing is everything and I was unable to do them all in one visit.

March-May and September-November are the best times of year to visit because you can see the beautiful cherry blossoms bloom in the spring and the changing of the leaves in the fall. But, don’t forget about Japan’s ski slopes and beaches.

Sumo wrestling matches happen throughout the year in different parts of the country. But, tickets for big tournaments sell out fast and it takes planning to attend.

Where to Stay

You only need one to two days in most of Japan. It is easier to base in one or two cities and then use your JR pass rail pass to get around to other parts of the country. I chose Tokyo and Kyoto. There is some debate over whether it is better to base in Osaka or Kyoto. I think Kyoto is quieter and has the old world charm. That is why many people are drawn to Japan in the first place.

There are so many options to chose from when determining where you will stay in Japan from traditional Japanese hotels called Ryokan to modern hotels. 

Personally I have grown quite partial to Airbnb, especially since I was in Japan for two weeks, which I booked for my stays in Tokyo and Kyoto. There are generally hundreds of options. In Tokyo, I recommend that you stay near one of the larger subway stations. This will help save time getting around the city.

5 Tips for Easy Travel in Kenya

travel in kenya

Travel in Kenya is probably one of the highlights of my all of may travel experiences. I love all the many facades of the country. From city life, to the mountains; from the coast to safari parks, there is so much to love about this country. As much as I enjoy traveling on the African continent, it can be a little daunting if it is your first time traveling there no matter the country. Kenya is no exception. Here are my 5 tips for travel in Kenya to hopefully make your experience more enjoyable.

1. Getting Around Kenya

One of the hardest things about travel to Kenya can be getting around the country. If it is your first time in Kenya, I recommend using a Nairobi-based travel agency, Travel Affairs, to book travel around the country and all of your safaris. To get around Nairobi and for day trips to the surrounding areas, you should hire a taxi for the day. It is completely normal and fairly affordable for the amount of things you can see in one day in the city.

I almost exclusively use Moshel Tours and Travel run by a great guy named Moses (+254 726937965/Moses.mbogo@yahoo.com). Moses has a fleet of drivers who you can call anytime of the day to help you get around the city. He even owns a safari vehicle with an open top, perfect for a safari in the Nairobi National Park. I have used and relied on his company since 2012 for almost all of my travel in Nairobi as well as travel outside of the city.

If you would prefer to book a tour, Viator.com, is a great option.  I use Viator for most of my travels. Regardless of what you chose, for about 7-8 hours of sightseeing in Nairobi, you should pay no more than $100-120.

I would avoid riding in boda bodas (motorcycle taxi) because traffic is crazy and they are more prone to getting into accidents. I would avoid matatus (van taxi) because they are generally packed with riders, do not follow the rules of the road, and you risk being robbed. Finally, I would not take an Uber in Nairobi. Things may have changed, but Uber drivers occasionally come under attack from other taxi drivers because Uber offers lower prices. Make sure you take reputable taxis. You put yourself at a higher risk of being in an accident in non-reputable taxis. Others may disagree, but I’ve spent a lot of time in Kenya and that is my take.

2. What to Pack: Bring layers

Travel in Kenya will require you to pack for a range of weather you may experience in one trip. The equator runs through Kenya, so one would think that it is blazing hot all of the time. Well, not quite. Elevation in Nairobi is 5,889 feet (1,795 meters) above sea level, so the temperature is fairly pleasant all year, averaging in the 70s. In the winter months (June – September), temperatures can drop to the 40s at night and in the summer (December – March), temperatures can rise to almost 90 degrees.

However, travel to Kenya during all times of the year, it tends to be a tad cooler in the mornings and evenings. It’s best to pack a pair of pants and a jacket regardless of when you travel. This is especially true on Safari. Game drives start early in the morning when it is chilly but can become uncomfortably hot during the day.

Of course, if you are traveling to the mountains, it will be cold, the rest of the country fairly hot all year, and the coast is very humid. Pack a hat or sun visor, and plenty of sunscreen.

3.  Shots/Medicine

Before you travel to Kenya, I recommend that you check out the Centers for Disease Control (CDC) and the World Health Organization’s (WHO) travel vaccine and health advice at passporthealthusa.com. You should definitely pack sunblock. The pleasant temperatures, particularly in Nairobi, can be deceiving. Kenya’s proximity to the equator can lead to sunburn even when it does not feel that warm outside.

If you are only traveling to Nairobi, anti-malaria medication is generally not required as mosquitoes do not carry the malaria virus at that elevation. However, it is recommended to take anti-malaria medication if you are traveling to other parts of Kenya. Mosquitos are prevalent no matter what city you are visiting, so pack mosquito repellent.

4. How to Get a Visa for Kenya

I think that before you travel to Kenya, you apply for a visa for Kenya online. It is required for all US citizens and is relatively simple to acquire online. I highly recommend printing off the submitted form and taking it with you to Kenya. From time to time they cannot find a request in the system and having the form may prevent you from having to pay twice.

5. Haggling/Shopping 

The only think I really do not like about travel to Kenya is haggling. Okay, so I HATE to haggle, but it is part of many cultures, to include the Kenyan culture. There are a lot of amazing and interesting things to buy in Kenya from affordable souvenirs–what we call Kenyan swag–to beautiful hand-carved furniture, woven and leather purses, jewelry, and clothing from patterned African cloth. It is common to negotiate the price on all of it. Most brick and mortar shops have fairly set prices. However, all outdoor markets expect negotiation.

Don’t be shy!! Unless you are clearly African to the seller, the first price will be way higher than the average price a Kenyan would pay, which makes perfect sense. My philosophy is to negotiate to a price I am comfortable with regardless. If you do not like the price, politely walk away.

If you are unsure about what is fair, ask your driver or tour guide. They generally have an idea of what you should pay. Just remember, people are trying to make a living by selling you their goods. You do not/not have to buy anything, but be polite about it. Just my two cents!

6.  Safety First

Before you travel to Kenya, here are a few safety tips:

  • I recommend checking out the State Department’s Kenya Travel Advisory to get the latest on crime and terrorism.
  • I love the food in Kenya and there is a lot of variety, but it is definitely possible to end up with an upset stomach. Stay away from street food and consider having your red meat cooked with as little pink as possible.
  • Credit cards work in most brick and mortar shops and restaurants. You will definitely need cash on hand, but travel with only what you think you will spend each day.
  • As I mentioned above, you should steer away from boda bodas and matatus, as they can be dangerous in chaotic city traffic. Stick to named taxis for getting around.
  • Do not travel with a lot of jewelry.

Sweets of Paris

When you think of France and French treats, a few things generally come to mind, macaroons and crepes. Here are a few of my favorite sweets and sweet shops in Paris that go beyond the average.

Sebastien Gaudard

Located on the Rue des Martyrs, Sebastien Gaudard is one of the oldest patisseries in Paris. Even though I have a sweet tooth, I’m very particular. Sebastien Gaudard has a good selection of French treats that are freshly made.

Angelina

I love Chocolate, but Angelina is another world when it comes to hot chocolate. Located on the Rue de Rivoli, along with several other shops in Paris, Angelina is a main attraction for tourists visiting the city. After standing in line for about 25 minutes, I was seated in the upstairs area. Angelina serves food that’s supposed to be delicious, but I was only there for one thing…hot chocolate and dessert. How can I describe this drink?? You know that hot chocolate your mom usually makes for you? A packet of powder and hot water and occasional warm milk instead of hot water. Either way, this ain’t that! Angelina’s hot chocolate is so thick it’s almost soup. For those strange people who don’t like chocolate…I wouldn’t recommend this tasty treat!

La Meringuée

I never expected to like meringue, but after watching several seasons of the Great British Baking Show, I figured I’d give it a go. I will say, this fluffy, light treat is definitely worth eating. Located on Rue des Martyrs, La Meringaie is one of several great shops where you can pick up yummy gifts for friends or a little treat for yourself.

Chocolat Illèné

Macaroons are a traditional French treat. There has not been a time when I went to Paris and I did not eat a ton of macaroons. One of the most famous shops in Paris and around the globe is Ladurée Paris, which I have nothing negative to say about. They have a decent variety of flavors and they always seem so fresh. However, you should definitely try one of the non-chain macaroon shops to get a taste of something slightly different. I recommend Chocolat Illèné located in Montmartre in Paris’ 18th arrondissement. Not only are the macaroons worth the trip, but Montmartre is a cute neighborhood known for its history, artistic nature, and night clubs.

A Day Trip to Champagne Region

Avenue de Champagne, Épernay

A last minute trip to Paris, gave me the opportunity to visit a part of France I had never been to before and to check one more item off of my bucket list…the Champagne region. I wanted to visit several of the oldest champagne houses in Reims and Épernay, France, such as Moët & Chandon, Taittinger, and Ruinart.

However to taste the delicious bubbly from the larger houses, you usually have to book weeks to months in advance. In addition, renting a car to make your way around the region or booking a tour through companies like Viator.com give you the best opportunity to see visit as many houses as possible. I did not have time for either during this trip, and considering I usually plan my trips months to a year in advance, I was tempted to put off going to the region until I could do it the way I wanted to. Instead, I booked a last minute trip to Épernay, also know as Faubourg de la Folie (“crazy suburb”), which is only a little more than an hour train ride outside of Paris. I chose Épernay because the Avenue de Champagne provides an array of champagne houses, large and small, where you can taste without a reservation.

When you first arrive at the Avenue, it does not look like much more than a quiet street, but it is really charming. Of note, several of the champagne houses are open seasonally and many are closed between 1130-1400. Not to worry though, you can arrive in Épernay at 1000, do several tastings, eat lunch, and head back to Paris by late afternoon.

My two favorite houses were Collard-Picard and Paul Etienne Saint Germaine. Both houses are small and quant and can only fit a hand full of people at a time. Lucky for me, I was there slightly off seasons and did not have to fight the normal crowds. Both houses offer two different tastings of three types of champagne, to include a Rosé that turned out to be my favorite tastings of the day of the day. I bought a bottle at both spots to enjoy this summer!!